
A baking mix jar is a pre-measured, ready-to-use collection of dry ingredients for a specific baked good, such as cookies, brownies, or muffins, neatly packed into a jar.
The concrete advantage of using baking mix jars is that they save preparation time, ensure precise measurements, reduce mess, and extend shelf life, while doubling as a thoughtful, customizable gift.
Whether used for personal convenience or as a present, a well-prepared baking mix jar allows for seamless baking with minimal effort. Instead of gathering and measuring ingredients each time you bake, a mix jar puts everything within easy reach.
When it’s time to bake, you simply add the specified wet ingredients—such as eggs, butter, and milk—mix, and bake. The jar not only speeds up the process but also guarantees consistency in flavor and texture because every batch starts with precise, pre-measured quantities.
From a storage perspective, these jars, when sealed properly, can last up to six months in a cool, dry pantry, maintaining ingredient freshness and quality.
As a gift, they offer practicality and charm, requiring minimal effort from the recipient while delivering delicious results. In short, a baking mix jar streamlines baking, ensures high-quality results, and serves as a practical, attractive gift.
Choosing and Preparing the Jar
The jar size is essential to ensure all ingredients fit while maintaining a visually appealing layered effect.
A standard quart-sized mason jar (32 oz) is ideal for most recipes, such as cookies, brownies, or muffins, accommodating enough dry ingredients for a full batch.
For smaller portions, such as single-serving pancakes or mug cakes, a pint-sized jar (16 oz) may suffice.
Regardless of size, the jar must be clean, dry, and equipped with an airtight seal to maintain ingredient freshness and prevent moisture ingress, which could cause clumping or spoilage.
Jar Size
Suitable Recipes
Capacity
8–16 oz
Mug cakes, small batches
1–2 cups
32 oz (quart)
Cookies, brownies, muffins
4 cups
64 oz (half-gallon)
Larger batch mixes
8 cups
To prepare the jar, wash it thoroughly and ensure it’s completely dry before layering ingredients. Residual moisture can compromise ingredient quality and shelf life.
Layering and Measuring Ingredients
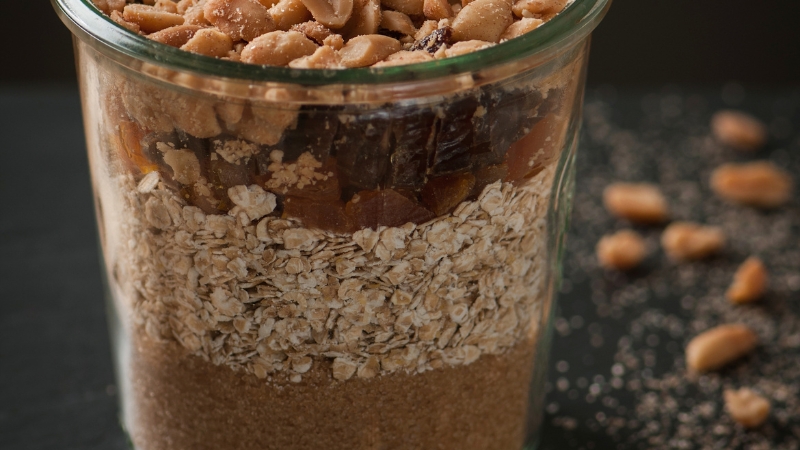
Ingredients should be layered by density, starting with the heaviest (such as flour or sugar) and progressing to lighter items (like chocolate chips or oats) to prevent mixing and settling.
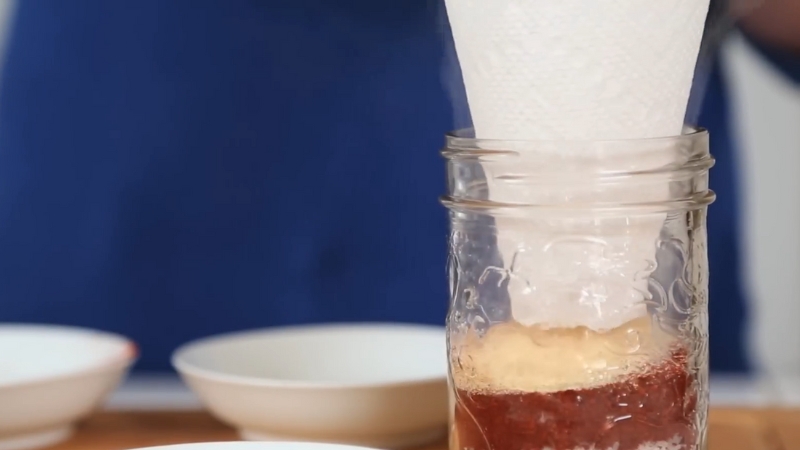
Use a wide-mouth funnel or parchment cone for ease when adding ingredients. Here’s an example for a chocolate chip cookie mix jar:
Ingredient
Measurement
All-purpose flour
2 1/4 cups
Baking soda
1 teaspoon
Salt
1 teaspoon
Brown sugar (packed)
3/4 cup
Granulated sugar
1/2 cup
Chocolate chips
1 1/4 cups
Compact each layer gently to create a stable structure, but avoid packing too tightly, which can make the mix difficult to pour out later. If necessary, lightly tap the jar on the counter to settle the layers.
Customizing Your Mix
The versatility of baking mix jars lies in their ability to cater to different preferences and dietary needs.
Gluten-free versions can substitute all-purpose flour with a 1:1 gluten-free baking blend. Vegan variations can use dairy-free chocolate chips, and the instruction tag can suggest alternatives for eggs and butter, such as flax eggs or coconut oil.
For added flavor, consider mixing in spices like cinnamon or dried ingredients such as chopped nuts, seeds, or dried fruits.
Customization requires clarity, so each substitution or addition should be accompanied by updated instructions, particularly if the mix is intended as a gift.
Labeling, Instructions, and Shelf Life
View this post on Instagram
A baking mix jar is only as useful as its instructions. A clear, durable label should include the recipe name, a list of wet ingredients to add, step-by-step baking instructions, yield information, and storage guidelines.
For example, for the chocolate chip cookie mix:
Storage longevity depends on ingredient freshness and proper sealing. A well-prepared jar stored in a cool, dry pantry should maintain quality for up to 6 months.
Including a food-grade silica gel packet or an oxygen absorber can help extend shelf life, particularly in humid climates.
Practical Tips for Preparation and Use
For a standard brownie mix jar, use the following measurements: By carefully selecting and preparing jars, measuring and layering ingredients precisely, providing clear instructions, and customizing mixes to suit different preferences, you can create a versatile kitchen staple or a memorable, useful gift. The process simplifies baking, reduces preparation time, and ensures consistently delicious results. Whether stocking your own pantry or preparing thoughtful gifts, a well-crafted baking mix jar is an investment in both time and quality.
Step
Details
Empty the Jar Contents
Begin by emptying the dry ingredients from the jar into a large mixing bowl. Ensure that the entire contents are transferred without leaving residue behind. The layered design helps ingredients flow smoothly, but you may need to gently tap the jar to release compacted items.
Add Wet Ingredients
Follow the recipe’s instruction card precisely, adding the specified wet ingredients (such as softened butter, eggs, milk, or oil). The accurate measurement of these wet components is just as important as the pre-measured dry mix to achieve consistent baking results.
Mix Thoroughly
Stir the ingredients together until a uniform dough or batter forms. Pay close attention to incorporating larger add-ins (like chocolate chips, nuts, or dried fruit) evenly throughout the mixture to prevent clumping or uneven baking. Use a sturdy spoon or electric mixer for optimal consistency.
Monitor Baking Time and Temperature
Transfer the dough or batter to the appropriate pan and place it in a preheated oven. Bake at the recommended temperature and time specified on the label. Ovens can vary, so monitor progress closely, checking for doneness with a toothpick or visual cues like golden brown edges. Adjust timing if your oven runs hot or cool.
Gifting Suggestions
If assembling jars for gifting, prepare multiple jars featuring different recipes (cookies, brownies, muffins) to offer variety. Use jars of similar size for a cohesive look, and label each one clearly with recipe names and instructions. Consider including simple baking tools like a wooden spoon, spatula, or measuring cups to enhance the presentation. Attach decorative elements like ribbons or tags for a polished, thoughtful finish.
Serving Suggestions and Storage
Suggest pairing baked goods with accompaniments like coffee, tea, or ice cream for gifting purposes. For home use, store any leftover baked goods in an airtight container at room temperature for up to three days or freeze for longer preservation.
Example: Brownie Mix Jar
Ingredient
Measurement
All-purpose flour
1 cup
Baking powder
1 teaspoon
Salt
1/2 teaspoon
Granulated sugar
1 cup
Brown sugar (packed)
1 cup
Unsweetened cocoa powder
3/4 cup
Chocolate chips/chunks
1 cup
Conclusion
Baking mix jars combine convenience, creativity, and practicality.