
The idea of homemade bread often feels wrapped in myths—long hours, tricky steps, or some kind of secret only bakers know. That kind of thinking only blocks the truth. Anyone can make it. No background in baking. No techniques passed down by grandmothers. Just real flour, real time, and a real oven.
The heart of homemade bread lives in its simplicity. There is no stage. No audience. Just you, the dough, and the quiet moments that turn flour into something unforgettable.
This guide strips away the noise. It brings bread-making into focus. No pressure. No fancy tools. Just a clear, dependable way forward.
By the end, your hands will hold something you made. Something golden, full of scent, texture, and pride. Homemade bread belongs to you now. Keep reading. Let it begin.
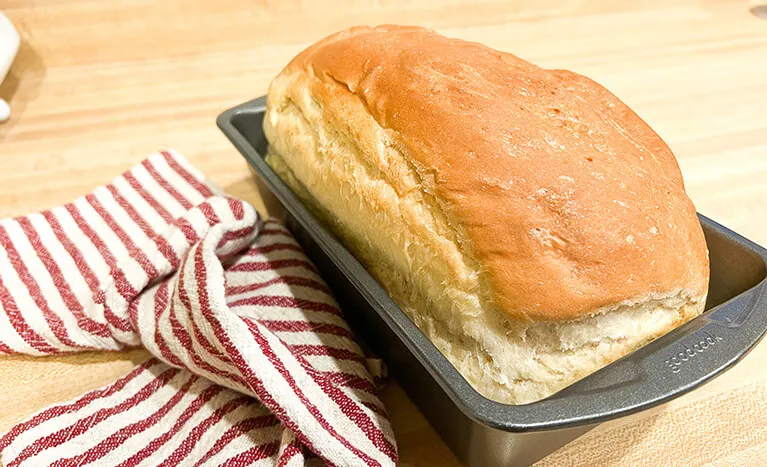
Easy No-Knead Beginner Bread
Equipment
- Large mixing bowl
- Wooden spoon or spatula
- Plastic wrap or clean kitchen towel
- Dutch oven or oven-safe pot with lid (or a cast iron pot/heavy lidded casserole dish)
- Parchment paper (optional)
Ingredients
- 3 cups 360g all-purpose flour
- 2 tsp salt
- ½ tsp instant yeast or active dry yeast
- 1½ cups 360ml lukewarm water
Instructions
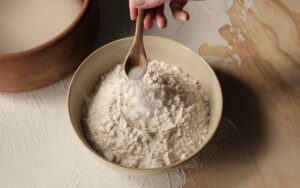
- Mix the DoughIn a large bowl, mix flour, salt, and yeast. Add lukewarm water and stir until a sticky, shaggy dough forms.
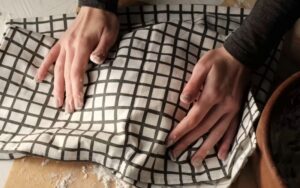
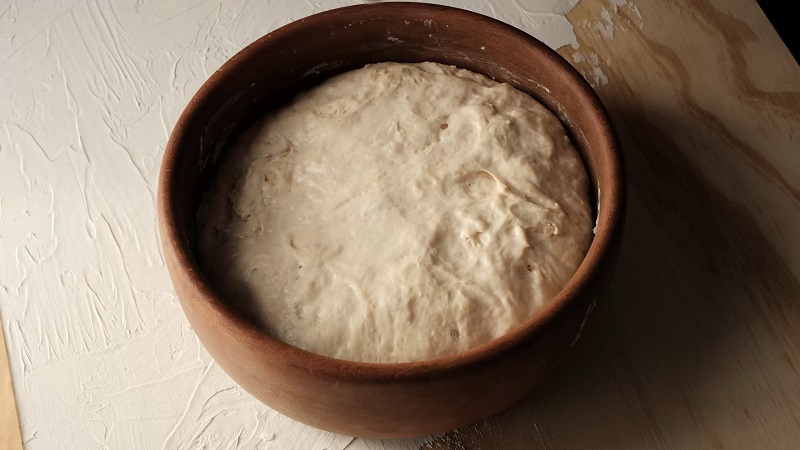
- First Rise (8–18 hours)Cover the bowl with plastic wrap or a clean towel. Let sit at room temperature until the dough is bubbly and doubled in size.

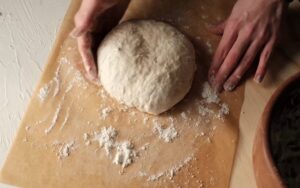
- Shape the DoughLightly flour your hands and surface. Gently shape the dough into a ball—no kneading required.
- Second Rise (30–60 minutes)Place the dough on parchment paper and loosely cover with a towel while the oven preheats.
- Preheat the OvenPut your Dutch oven (with lid) into the oven and preheat to 450°F (230°C) for 30 minutes.

- Bake the BreadCarefully remove the hot pot. Transfer dough (on parchment) into the pot. Cover and bake for 30 minutes.

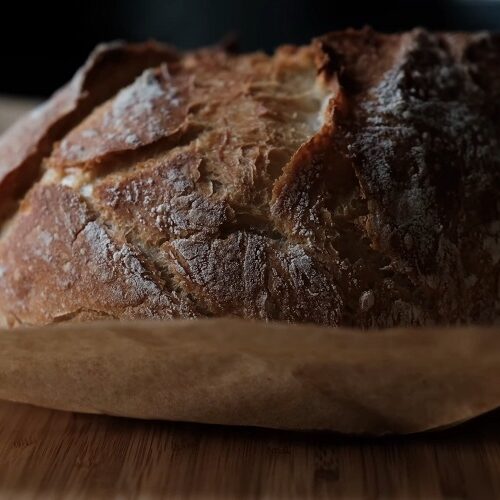
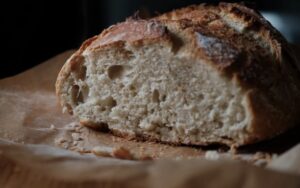
- Uncover & BrownRemove the lid and bake for another 10–15 minutes until golden brown.

- CoolRemove from pot and cool on a wire rack for at least 1 hour before slicing.
Notes
- Dough will be sticky - resist the urge to add more flour.
- For extra crunch, turn off the oven and leave bread in for 5 more minutes with the door slightly open.
- Add chopped herbs, garlic, or cheese before shaping for flavor variations.
- If using active dry yeast, dissolve it in warm water first.
Proper Dough Texture: What You’re Looking For
After mixing, your dough should be very sticky, slack, and shaggy—think closer to wet biscuit batter than firm pizza dough. This high-hydration dough (roughly 75–80% hydration, depending on your flour) is essential for building gluten naturally over a long fermentation.
Key indicators it’s right
- Sticks to your fingers, but pulls away with a bit of effort
- Bubbles may already begin to appear after an hour
- Holds its shape loosely when scooped, but spreads over time
Troubleshooting
- Too dry (crumbly or firm): Add water 1 tbsp at a time
- Too wet (soupy): Add 1 tbsp flour at a time until it’s sticky but cohesive
Second Rise Timing: Why It Matters
The second rise, or bench rest, does more than give your bread shape—it lets the gluten relax and redistribute gases formed during the first rise. This leads to a better oven spring and more defined crumb structure.
Ideal timing
- 30 to 60 minutes, depending on ambient temp
- Dough should puff slightly but not double
- Surface may become slightly smoother and feel airy underneath
Over-proofing risk: If the dough spreads flat or tears when scored, it’s over-proofed. In that case, bake immediately—it won’t rise much more, but will still taste great.
No Dutch Oven? Here’s What to Use Instead
The reason a Dutch oven works so well is because it traps steam, mimicking professional steam-injected ovens. This steam keeps the crust soft for the first 30 minutes so the loaf can expand fully, before crisping in the final bake.
Alternatives
- Heavy-duty pot with a lid: Stainless steel, ceramic, or cast iron
- Cast iron skillet + inverted metal bowl or foil dome: Not as effective, but workable
- Baking stone or sheet pan + pan of boiling water: Place water pan on lower rack
Best practices
- Always preheat your vessel for at least 30 minutes
- Avoid glass cookware—it may crack under high heat
Final Thoughts
Bread doesn’t need to be complicated. This method strips it down to what actually matters: time, heat, and good ingredients. You don’t knead, you don’t fuss, and you still end up with a crusty, golden loaf that smells like you know exactly what you’re doing.
If it’s your first time, expect it to look a little rough—and still taste incredible. Once you’ve done it once, you’ll understand the rhythm. After that, it’s just flour, water, salt, and patience. Nothing else required.
Next on the Menu – Cottage Cheese Bread