Clarified butter, also known as “ghee” in Indian cuisine, is butter that has been simmered and strained to remove its water content and milk solids, leaving behind pure butterfat.
This process changes both the texture and the flavor of the butter, making it more concentrated, nutty, and, importantly, more stable for cooking at higher temperatures.
Table of Contents
ToggleThe Three Layers of Butter
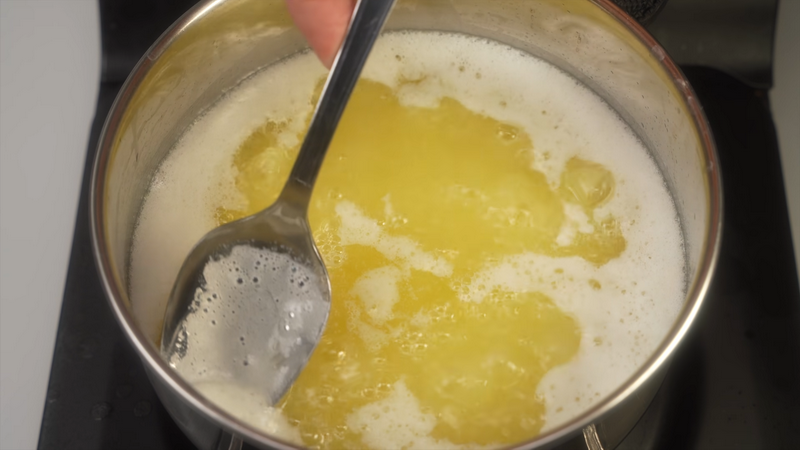
When butter is melted, it separates into three layers:
| Layer | Description |
| Foam (Top Layer) | This is the water that evaporates as the butter heats. |
| Milk Solids (Bottom Layer) | These are the proteins and sugars that sink to the bottom. They tend to brown and burn easily during cooking. |
| Pure Butterfat (Middle Layer) | This is the clarified butter, golden and rich, that you want to extract. |
How to Use Clarified Butter
Sautéing Vegetables
One of the simplest ways to use clarified butter is for sautéing vegetables. Its high smoke point makes it perfect for high-heat cooking, allowing your veggies to brown beautifully without burning.
Clarified butter enhances the natural sweetness of vegetables, like carrots, bell peppers, and asparagus, while also giving them a lovely golden color and slightly nutty flavor.
Searing Meats and Fish
When it comes to searing meats or fish, clarified butter is a game-changer. It creates a crisp, golden crust on the outside while keeping the interior juicy and tender.
This is especially useful for cuts of steak, chicken thighs, or delicate fillets of fish like salmon or halibut.
Method:
- Heat clarified butter in a skillet until it shimmers.
- Add your seasoned meat or fish and sear on high heat.
- Finish cooking in the oven, or simply reduce the heat to cook through while maintaining the crisp exterior.
Making Sauces
Clarified butter is the foundation for several classic French sauces like Hollandaise and Béarnaise. Because it’s pure butterfat, it blends smoothly into sauces without separating, resulting in a silky, creamy texture.
Frying and Deep-Frying
Believe it or not, clarified butter can be used for frying and deep-frying because of its stable structure and high smoke point.
While it might not be practical for large batches of deep-frying, clarified butter is excellent for frying foods like eggs, pancakes, or even small pieces of breaded chicken or fish.
Brushing on Bread or Pastry
Use clarified butter to brush onto bread or pastry before baking. Its concentrated fat content gives baked goods a richer flavor and a beautifully crisp exterior. Try brushing clarified butter over homemade naan, croissants, or even pie crusts for a gorgeous golden finish.
Cooking Eggs
Clarified butter is fantastic for cooking eggs, whether you’re making scrambled eggs, omelets, or fried eggs. It allows the eggs to cook evenly without sticking to the pan or burning. Plus, the butter enhances the eggs’ natural flavor without overpowering them.
Method:
- Heat a small amount of clarified butter in your skillet.
- Pour in your beaten eggs or crack them directly into the pan for fried eggs.
- Cook to your desired doneness, and enjoy the perfect buttery eggs.
Roasting Meats and Vegetables
Clarified butter can also be used to baste meats and vegetables while roasting.
Its ability to withstand high heat means it won’t burn during the cooking process, and it will help achieve a beautiful caramelized finish on everything from roasted chicken to root vegetables.
Making Popcorn
Popcorn and butter are a match made in heaven, but regular butter can make popcorn soggy due to its water content. Clarified butter, however, solves that problem by offering all the rich flavor of butter without the moisture.
Method:
- Drizzle warm clarified butter over freshly popped popcorn for a light, crisp, buttery snack.
Baking
Though it’s not commonly used in baking due to its liquid state at room temperature, clarified butter can still be a powerful ingredient in certain recipes, such as in shortbreads, cookies, and cakes that benefit from its rich flavor.
Why Use Clarified Butter?
Before we jump into the different ways to use clarified butter, let’s break down why it’s worth the effort to make or buy it.
1. High Smoke Point
One of the most practical reasons to use clarified butter is its high smoke point, which is around 450°F (230°C)—significantly higher than regular butter, which burns at around 350°F (175°C).
This makes clarified butter ideal for high-heat cooking methods like sautéing, searing, and frying, where traditional butter would break down and burn, leaving a bitter taste.
2. Rich, Concentrated Flavor
Clarified butter has a richer, more concentrated flavor compared to regular butter. The milk solids that have been removed during clarification carry the sugars and proteins that can sometimes overpower dishes.
The result is a nuttier, purer flavor, which complements both savory and sweet dishes without adding unwanted complexity.
3. Longer Shelf Life
Removing the milk solids and water extends clarified butter’s shelf life, meaning it can last much longer than regular butter.
In fact, clarified butter can be stored at room temperature for weeks, especially when kept in an airtight container, making it ideal for people who don’t use butter frequently or for anyone looking to reduce refrigerator clutter.
4. Lactose-Free
For individuals who are lactose intolerant or sensitive to dairy, clarified butter can be a great alternative. Because the milk solids (which contain the lactose) are removed, clarified butter can often be enjoyed by those who avoid dairy.
5. A Versatile Ingredient
Clarified butter isn’t limited to just frying or sautéing; it can be used in a wide range of dishes. From boosting the flavor of baked goods to giving roasted vegetables a rich finish, its versatility knows no bounds.
Now that we’ve established why clarified butter is such a fantastic ingredient, let’s move on to how you can make it at home.
How to Make Clarified Butter
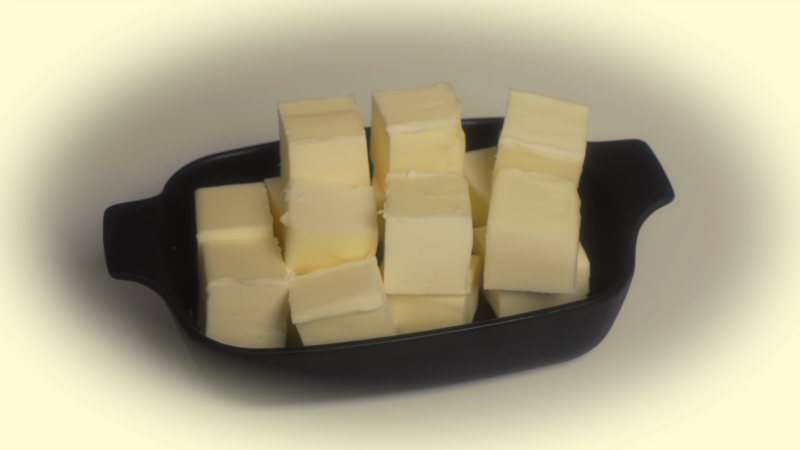
Making clarified butter is surprisingly easy, and it requires nothing more than a block of unsalted butter and a little bit of time. Here’s a simple step-by-step guide. Ingredients:
- Unsalted butter (as much as you need)
Instructions:
- Melt the Butter Place the butter in a saucepan over low heat. Allow it to melt slowly without stirring.
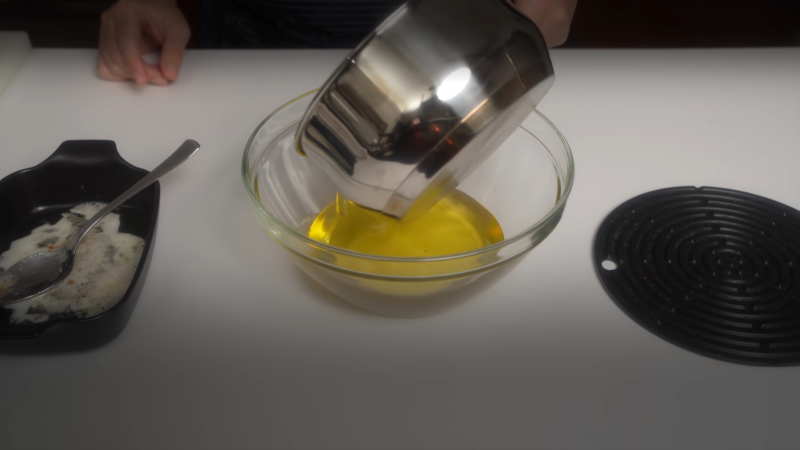
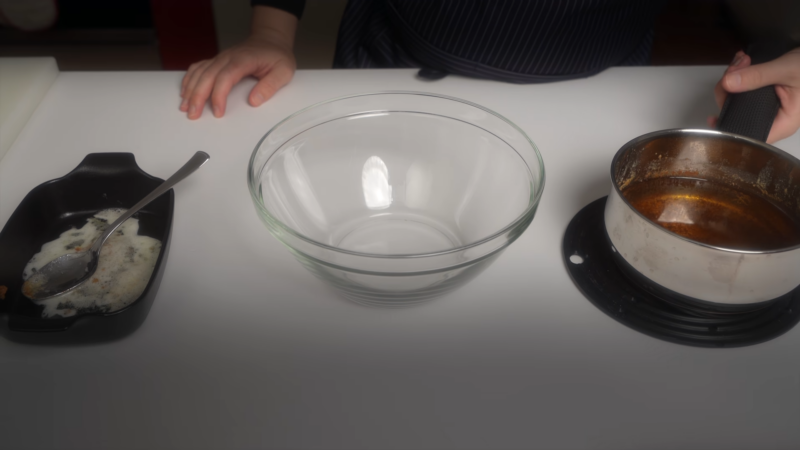
- Simmer and Separate Once the butter has fully melted, you’ll notice it begins to separate into three layers: a foamy top layer (water evaporating), a middle layer of clear golden butterfat, and a bottom layer of milk solids.
- Skim the Foam Using a spoon or skimmer, gently remove the foam from the top of the butter.
- Strain the Butter After skimming the foam, carefully pour the clarified butter into a clean jar or container through a fine mesh strainer lined with cheesecloth to catch the milk solids. Be sure to leave behind the milky residue at the bottom of the pan.
- Store Once strained, let the clarified butter cool. It can be stored in an airtight container at room temperature for up to 2-3 weeks or in the refrigerator for up to 6 months.
And that’s it! You now have homemade clarified butter ready to use in your favorite dishes. Now, let’s explore the many ways you can use clarified butter to enhance your cooking.
How to Store It
Once you’ve made clarified butter, you can store it for a surprisingly long time. Keep it in an airtight container, and it can last at room temperature for a couple of weeks.
In the fridge, it can last for several months. The best part? Its flavor only deepens over time, and you’ll find yourself reaching for it again and again.
In Summary
Clarified butter is like your kitchen’s secret weapon. It’s rich, delicious, and makes everything taste better—whether you’re frying eggs, roasting veggies, or searing a juicy steak.
Once you start using it, you’ll wonder why you didn’t sooner. It’s like regular butter but supercharged!

